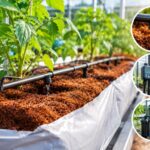
The first sign is almost never the roots. It is a plant that wilts slightly at midday and recovers by evening, and you write it off as heat stress because that is the reasonable thing to do. Two weeks later you are pulling slabs. Root rot in coco coir works like that, quietly, and by the time it becomes obvious it has usually been running for a while.
The good news, if you want to call it that, is the causes are short in number and mostly environmental. Coir itself is not the problem. Coir is inert, sterile as it arrives, and actually more resistant to pathogen pressure than field soil. What creates trouble is how we run it.
Here are the seven culprits, roughly in order of how often they turn up.
First, what you are actually dealing with
Three pathogens account for most cases in greenhouse production, and they behave differently enough that guessing is expensive.
Pythium likes water. It moves in saturated conditions, attacks fine feeder roots first, and leaves you with brown, slimy root tips that slip their outer layer when you pull them. Phytophthora is nastier, hits the crown and stem base, and spreads through irrigation water fast. Fusarium is the slow one, vascular, often showing as one-sided wilting and brown streaking inside the stem.
If you have not sent a sample to a lab, you are treating a hypothesis. Worth remembering before you buy anything.
Cause 1: The first week, when the slab is wetter than you think
New coir holds a surprising amount of water once it is fully conditioned, and growers routinely overshoot in the establishment phase because young plants “look thirsty”.
They are not thirsty. They have a tiny root system in a large, saturated volume, and the oxygen in that root zone is being pushed out. Pythium does not need an invitation at that point.
Run your first drain early, keep the shots small and frequent rather than large and occasional, and let the slab pull back overnight. Establishment is the single highest risk window in the whole crop.
Cause 2: A particle grade that never suited the crop
Fine pith holds water beautifully. That is exactly why it is wrong for a deep-rooted, long-cycle crop that wants air in the root zone.
Air filled porosity below roughly 10 percent starts putting you in dangerous territory for tomatoes, capsicum and cucumber. A pith heavy blend that works perfectly for lettuce plugs will suffocate a high-wire tomato by week six. This is the quiet cause, the one that never shows up in a diagnostic report because the substrate is not technically defective, it is just mismatched.
Check the particle size distribution on your spec sheet against the crop before you order, not after the symptoms appear.
Cause 3: Your water, not your substrate
Here is the thing growers hate hearing. Most pathogen introduction in a clean coir system comes through irrigation water, particularly recirculated water.
Surface water sources, catchment ponds and unfiltered rainwater all carry Pythium and Phytophthora zoospores. Those spores swim. Once they are in a recirculating system they get delivered to every plant on the site with perfect efficiency.
UV treatment, slow sand filtration or heat treatment of return water are the standard answers. They cost money and they are worth it. Growers in the Ontario cluster represented by the Ontario Greenhouse Vegetable Growers have largely moved to treated recirculation for exactly this reason.
Cause 4: Root zone temperature nobody is measuring
Air temperature is measured obsessively in most greenhouses. Root zone temperature often is not.
Cold slabs in early spring slow root activity and extend the period roots sit in wet conditions. Hot slabs in summer, especially in bags sitting directly on concrete or on black plastic, push the root zone above 25 degrees Celsius where Pythium multiplies happily.
A cheap substrate probe tells you more about root health risk than most of what sits on your climate computer. If you only add one sensor this season, add that one.
Cause 5: Reused slabs that were sterilised in theory
Reuse is one of coir’s real advantages, and it becomes a liability the moment sterilisation gets rushed.
Steam sterilisation needs to reach temperature throughout the slab, not just at the surface, and hold it. A quick pass with a steam hood over stacked slabs achieves very little in the middle of the pile. Chemical sterilisation needs full contact and sufficient dwell time.
If you are reusing and you have seen pressure in the previous crop, the honest answer is often to replace rather than reuse that block. The saving is not worth the second season.
Cause 6: Old root mass left in the slab
Dead roots from the previous crop are food. They break down, they consume oxygen as they do it, and they give pathogens a substrate to colonise before your new plants establish.
Growers who reuse successfully generally remove as much old root mass as practical, flush thoroughly, and give the slab time to drain and re-equilibrate before replanting. Those who skip this step and plant straight into last year’s root network tend to be the ones asking why root rot in coco coir keeps returning to the same blocks.
Cause 7: Treating the symptom instead of the root zone
Biological and chemical treatments have a place. Trichoderma and Bacillus based products genuinely help as preventives, and there are registered fungicides for specific pathogens in most markets.
None of them fix a saturated slab. None of them fix 6 percent air filled porosity. If your irrigation strategy is drowning the root zone every morning, no product on the shelf is going to hold that line for a full crop.
Fix the environment, then use the biology to defend it. That order matters, and growers who flip it spend a lot of money slowly.
A weekly check routine that catches it early
None of this needs a dedicated technician. It needs ten minutes and a consistent habit.
Once a week, pull one plant from a representative block and look at the roots properly, in daylight, not squinting under a bench. Healthy coir roots are white to cream, branched, and firm. Note anything brown, soft or sparse, and note where in the block it is happening, because rot starting at the base points at saturation while rot starting at the crown points at water-borne infection.
While you are there, check three other things. Squeeze the slab and judge whether it feels heavier than it did yesterday at the same time. Put a probe in and read root zone temperature. Look at the drain tray and confirm you are actually getting the drain percentage you think you are.
Write the numbers down. The value is not in any single reading, it is in seeing drift across four weeks. Almost every serious case of root rot in coco coir that growers describe as sudden was visible in the data three weeks earlier, and nobody was looking.
One more habit worth building: keep a note of which blocks came from which production lot. If pressure shows up in a pattern rather than randomly across the house, that tells you something about sterilisation or storage rather than about your irrigation.
Root rot in coco coir: a quick diagnostic comparison
| Pathogen | First symptom | Root appearance | Main driver |
| Pythium | Midday wilting, slow growth | Brown feeder roots, outer layer slips off | Saturation, low oxygen, warm slabs |
| Phytophthora | Sudden collapse, stem base lesion | Dark crown rot, firm rather than slimy | Contaminated water, splash spread |
| Fusarium | One-sided wilt, yellowing | Brown vascular streaking in stem | Infected transplants, reused media |
| Physiological | Uniform wilting across the block | Roots intact but sparse | Irrigation or EC error, not disease |
That last row exists because a meaningful share of suspected disease cases turn out to be irrigation problems wearing a costume.
What growers tell us after they fix it
A cucumber grower in British Columbia was blunt about it: “I used this as like this for my first two crops, watering heavy in establishment because that is what I did in rockwool, and I lost plants both times. Changed to small frequent shots with an early first drain and the problem stopped. Same substrate, same water, different schedule.”
A propagation nursery in the Netherlands framed it from the customer side: “Our customers are really happy with our plug quality since we put UV on the return water, and they said like this, the transplants just do not stall anymore.” Their substrate did not change either.
Two operations, two different fixes, same underlying lesson. The medium was never the variable.
Frequently asked questions
Does coco coir cause root rot?
No. Properly processed coir arrives effectively sterile and drains well. Root rot in coco coir develops when the root zone becomes oxygen starved, when pathogens arrive through irrigation water, or when reused material was not sterilised properly. The substrate is the location, not the cause.
How do I know if it is Pythium or just overwatering?
Physiological stress from overwatering usually shows uniformly across a block and the roots, while sparse, stay white or cream coloured. Pythium leaves brown feeder roots whose outer layer sheaves off easily when pulled. When in doubt, send a sample for testing rather than guessing, because the treatments differ.
Can I save a crop once root rot starts?
Sometimes, if you catch it early. Increase drain percentage to flush, raise root zone oxygen by reducing shot size and increasing frequency, correct root zone temperature, and apply a registered treatment for the confirmed pathogen. Established infections in a mature crop are much harder to reverse than early-stage pressure.
Is it safe to reuse coir slabs after a disease outbreak?
Generally not recommended. The cost of replacement is small compared with carrying pathogen pressure into a second crop. If you must reuse, steam sterilise to temperature throughout the slab and verify with probes rather than assuming.
What root zone temperature should I aim for?
Most greenhouse vegetables perform well between roughly 18 and 22 degrees Celsius at the root zone. Below 15 slows root activity and extends wet periods. Above 25 favours Pythium. Bags sitting on hot concrete in summer regularly exceed that without anyone noticing.
Where to focus first
If you are dealing with pressure right now, work through it in this order. Check air filled porosity, check your irrigation timing and drain percentage, measure root zone temperature, then look at your water source. Only after those four should you start buying products.
And if you are setting up a new crop, most of this becomes a non-issue with the right grade and a sensible irrigation plan from day one. The setup steps in this grow bags guide cover the conditioning and first-drain side properly, and suppliers such as Coco Labs publish particle size and porosity figures so you can match grade to crop before the container ships rather than after.
For background on how coir is processed and why the raw material behaves the way it does, the general reference literature is a reasonable starting point before you go deeper into grade selection.